Loading...
Loading...
Loading...
Loading...
Loading...
Loading...
Loading...
Loading...
Loading...
Loading...
Loading...
Loading...
Loading...
Loading...
Loading...
Loading...
Loading...
Loading...
Loading...
Loading...
Loading...
Loading...
Loading...
Loading...
Loading...
Loading...
Loading...
Loading...
Loading...
Loading...
Loading...
Loading...
Loading...
Loading...
Loading...
Loading...
Loading...
Loading...
Loading...
Loading...
Loading...
Loading...
Loading...
Loading...
Loading...
Loading...
Loading...
Loading...
Loading...
Changes you make to Intents and Utterances are not immediately available. These need to be used to generate a Machine Learning model before they can be used. To build a model you’ll find the Builds tab on the navigation bar.
Clicking on the build button will start a process of generating the model. You can add an optional description to the build before clicking on Build. This will help to capture why this build was produced, what changes were made etc. Depending on the number of intents you have in your application this may take anything from 30 seconds to 5 minutes. The page will refresh every 30 seconds to check the status of the builds and it’ll change to Complete when it is done.
Once a model has finished building you will be able to test the changes you’ve made using normal testing widget.
NLP stands for Natural Language Processing and is the ability for a machine to be able to take an unstructured piece of text, such as a sentence of paragraph and process it in such a way as to understand the meaning behind it. This is a technique that falls under the umbrella term of Artificial Intelligence.
Within a digital assistant project we use NLP to understand what the user has typed. This is very important in terms of determining the users Intent, and any Entities contained within the message.
In particular, when thinking about a digital assistant, we use NLP to perform a type of task called Classification, and in particular Intent Classification. It is a supervised learning task in that the system can not classify the intent correctly without some information provided to it in the first place. This supervised process has the following steps :
Generate a data set containing a wide and diverse set of things that a typical user might say.
Apply a label to each piece of data to help the machine understand what that sentence means. This label will be the intent name.
With the set of data now labelled we pass the information through an NLP process which generates a machine learning model. This model is unique and based on the training data set that has been provided.
Once you have created a model we can then evaluate it by providing new phrases ( or ) to it for classification. This phrase will then be evaluated against each label that is within the model. The process will provide a score for each label, between 0 and 1, where 1 is essentially 100% confident in the classification. The accuracy of a model will be a measure of how many times a new utterance is correctly identified as the right intent. In this case the intent identified is the intent that has the highest confidence value.
To get started with NLP , you can watch this video to better understand some of the terminology used in the NLP world.
Within any application there are a number of different types of content you may want to show to the user. This ranges from simple text or image based responses through to more complicated forms that collect information from the user. Here we explain all of the possible block types you can use.
This is the most used block type. To sum it up, if your bot is 'just saying something', this is the block type you need.
With this type of block your bot can:
say something to the user
offer button options to guide the user - see
keep those button options active after the conversation moves on (just check the 'Keep buttons after user choice' box)
If your bot is doing more than just saying something, e.g. collecting data or looking something up in another system, it's probably a you need.
Does you bot need to do something? Gather user details, find something out from another system, email someone, etc.? If so, it's time for a function block.
Function blocks themselves are very similar to a Basic Block however they will also pass the data out to any that are configured in the bot.
When adding a function you can either choose from a number of the prebuilt functions within the platform or you can create a generic function block knowing that you or a member of the team will implement the functionality for it through the webhook.
In order to help build out the conversation quickly, and while you are waiting for any development to continue, you can create a Function block but temporarily disable the bot from attempting to send the information to the webhook. To achieve this inside a function block, you'll see a 'To do' checkbox. While this is checked, the bot will not attempt to post data to the webhook or built-in function. Instead, it will display the temporary information and move on. You may want to use the temporary fields to 'fake' what your bot does for prototype purposes, or to just write a description of what the bot will do as a reminder. Then you're free to carry on designing your experience.
When the developers come to build the function, they'll use the facility in settings and uncheck the 'To do' box. Once this is unchecked, the bot will try to complete the function properly and won't show the information in the temporary fields.
These are things you can make your bot do - no coding knowledge necessary. They work by using as a basis. You just need to configure the block and vóila - your bot just moved up a league in the chatbot stakes!
Great for enquiries, reservations and lots more. It's easy to set your bot up so it takes some information from the user and sends this to a mailbox of your choice.
As well as the usual information a block can provide, the Email block will also require a that will ask all the relevant questions you need to extract. You will also need to provide the information specific to sending the email such as the To Email, From Email, and Subject
Of course, you don't want to leave the user hanging once you have the info, so remember to tell your bot what to say next, with a Next block.
As many companies choose Salesforce as their CRM platform of choice, we created the Salesforce - create a case block - ideal for raising tickets with humans.
To use this block you'll need to configure some settings first. Go to the Settings area of the platform and select Salesforce from the left-hand menu. The information here will include the Client ID and Authentication tokens needed to connect to Salesforce.
Once you've configured the Salesforce settings you'll be able to add the block to your content. There are no additional properties you need to configure for this block type.
IntelAgent remembers information that a user has provided during a conversation. For instance, if the user has entered their address, the bot won't ask for it again if it's needed for another action.
While this is useful, there are times when you want to be able to reset any information that a user has provided. For instance, if a user orders something to go to one address but then wants to order something else to go to another address you may want to be able to clear the address information for that user.
An Unset form function block will clear the information associated with the current user, for the form identified in the block. It will not clear any other information collected from other forms which means that you can clear the address information, but persist the users name or email if you've collected that via a different form.
If you're planning on integrating with an external platform such as a Database or CRM one option is to develop the integration manually. However, Zapier is a platform that has integrated with over 3000 different platforms already and as a result may well have built that integration before. With this in mind it might be easier and cheaper to provide the integration with the help of Zapier instead.
To integrate with Zapier, you'll need the Zapier block in logicdialog. More information about integrating with Zapier can be found on the page.
As the name suggests, Image blocks allow you to present images to the users. Logicdialog allows you to easily drag and drop the image you wish to show to the user on to the block.
If you wish to have more than one Image then you can use the Gallery option. Using the buttons at the top of the block you can add any number of Items to the gallery. Each item can have the same features as a normal block such as a title and buttons etc.
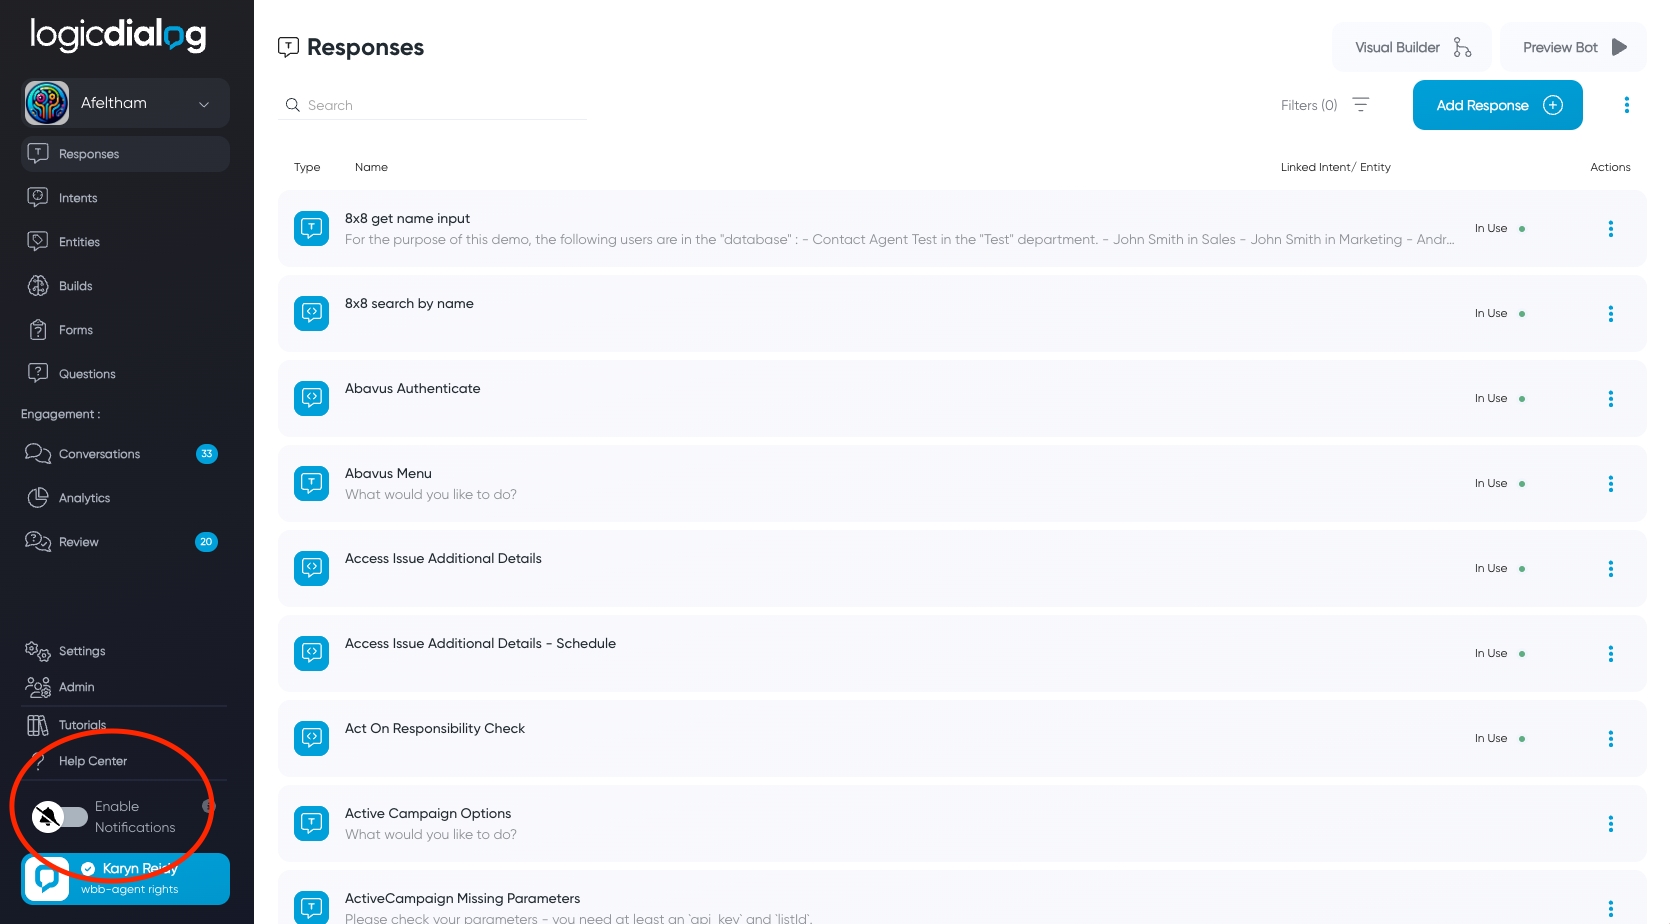
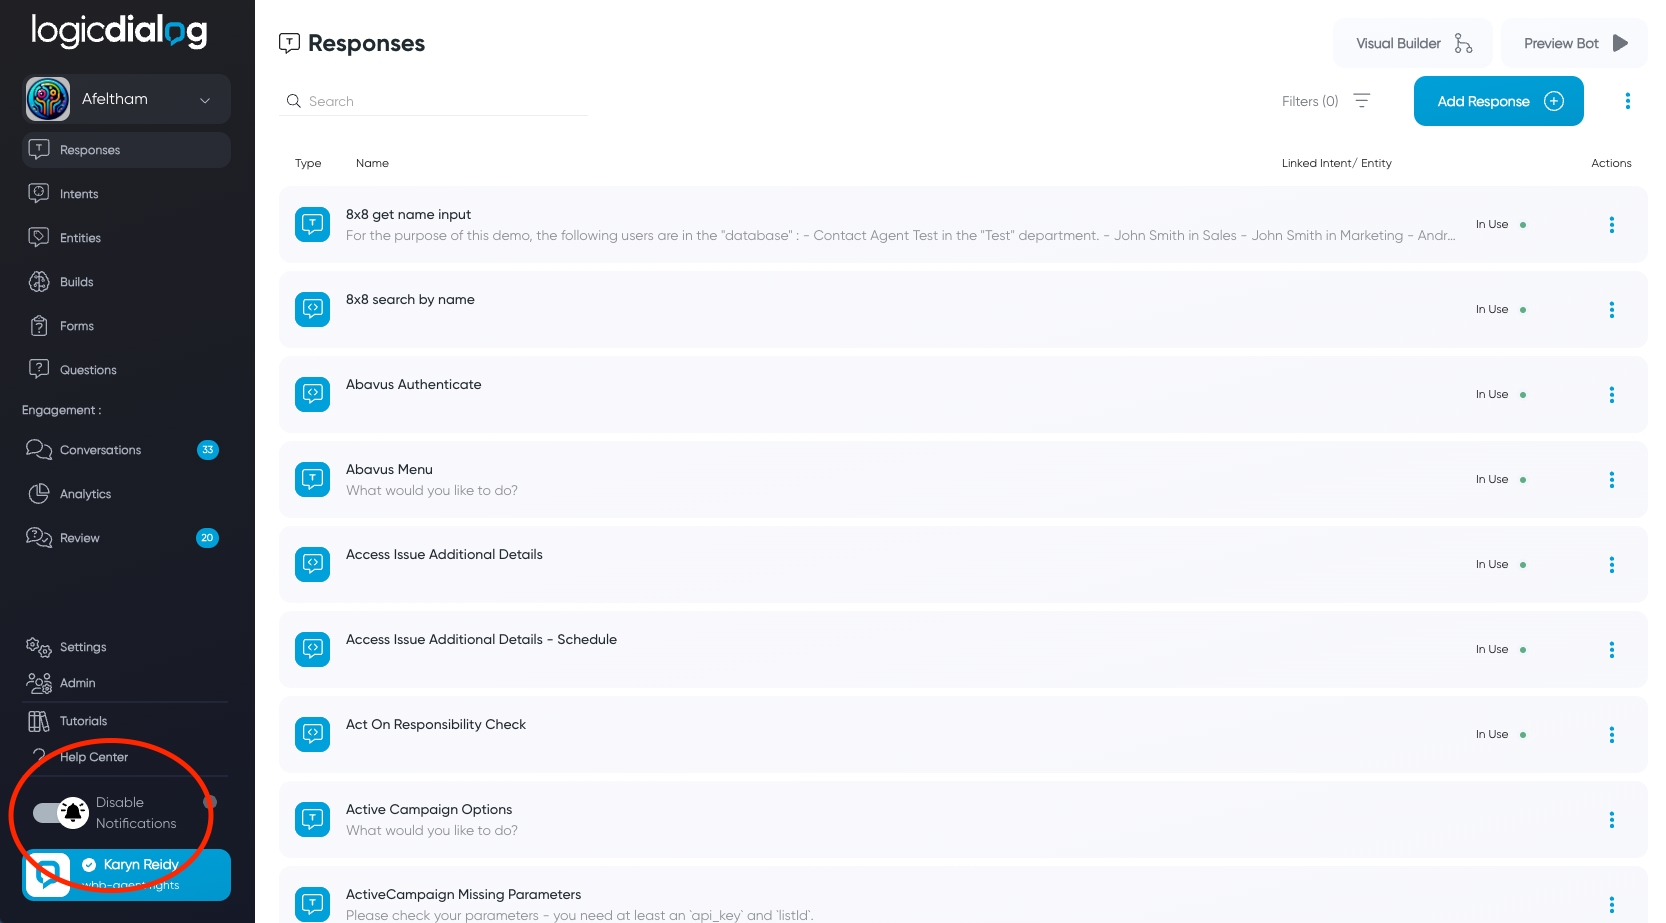
The best place for building out your bot is in the Visual Builder, accessible from the Responses tab.
When you log in for the first time your bot will have 2 blocks on the Visual Builder canvas: Intro and Menu. These are 2 of the default blocks that come with every logicdialog bot.
This block houses what will be said to your visitor the first time they visit your site (or whenever a new session is started). Usually bots will lead with who they are and what they do.
This block is reserved for a short bit of text and optional buttons to get your user started on their conversational journey. Usually the text will consist of a leading question and the buttons will act as hints to the user on what they can use your bot for.
You can edit the Intro and Menu blocks whenever you like. You know better than anyone what your bot will do so will be able to set the scene much more efficiently than the generic content in them at the outset!
As this is likely your first time designing a bot, we'll walk you through designing a button-led journey first.
When you're done here you may want to and what they're good for, but for now we'll keep things simple and select the 'Basic block'.
When you're done, test your bot using the Preview bot button at the top of the Visual Builder page. Ta-da! Here you have your very first logicdialog bot.
You may want some journeys within your bot that are only accessible when the user types what they need and the bot recognises what the user wants (See ). I.e. Not via any button menus.
To create a new Visual Builder canvas for these journeys you should first create a standalone block from the Responses screen. After you've saved it, you can find the block and select the Visual Builder button on the block itself. That will open the Visual Builder canvas and it will show your new block as the starting point, allowing you to build out the flow as normal.
You may have a good idea of what it is you want your bot to do, but some find it difficult when it comes to actually sitting down and writing the content. Many people get stumped when it comes to deciding how the bot should respond in various situations.
Fortunately, creating content is easier than you think and the following video will give you a good guide to creating your content.
Although you may have chosen a specific block type when initially creating your content, it's very easy to update the type of a block at a later date.
Within the visual builder, select the three menu dots in the right-hand corner of the block you want to change.
Next, select Convert Response.
You'll then be able to select the type of block you want to convert it to. It'll take any details from the original block it can transfer and display them back to you. Add any extra details required of the new block type and select Save changes.
When an existing block is the perfect next step for your bot, you don't need to replicate it. You can reuse the existing block. There are a few ways to do this which are explained below.
When you create a button you can select an action by clicking on the three dots onthe right hand side of your new button. Here you can use one of four options to determine what should happen next if someone selects it. Choose the option: Link to Response. Find and select the block you want to link it to and it'll be added to your flow.
Although users will often express what they want via natural language, buttons are a very useful way of ensuring that users continue down the right path quickly once they've mentioned what they need. For example, a user might mention I need help with council tax and then be presented with buttons relevant to Council Tax. This is much easier than navigating an entire structure via buttons.
When you edit a Response, you will see an Add button
It's always a good idea to preview your bot before you go live, and to make things easier you can do this from the same place you build - the Responses screen or the Visual Builder.
Simply select the Preview bot button from the top of the screen and a pop up will appear. Now you can use the bot just like any other user would.
Logicdialog does the ordinary so your teams can do the extraordinary
Logicdialog is an online platform for building Digital Assistants ( or bots ) using advanced Artificial Intelligence techniques which make use of Large Language Models and Natural Language Processing. With the platform you can create an ever growing number of use cases, such as :
Collecting form based information from your users about queries or problems.
Within any there might be many things that you wish to identify or refer to. For example, in the sentence When is my green bin being collected? the Intent might be Bin Collection but the response to the user might be dependant on the type of bin that the user is referring to. In this example the green bin is described as an entity within the utterance.
Essentially an Entity is a noun within the sentence that has some relevance to the content the bot is trying to provide.
Within the platform you can create any number of Entities from the Entities screen available from the left hand nav bar.

Intents, where there is more than one way to say the same thing, there can also be multiple ways of referring to the same entity. For example, a Food Bin might be mentioned as a food caddy, foodbin, brown bin, food recycling bin or food waste bin. These are all called Synonyms for the Entity and you can provide as many of these as you need to for each entity. 

Dynamic knowledge import is a crucial feature that empowers Logicdialog to provide accurate, up-to-date, and comprehensive answers by drawing from a curated knowledge base. By importing content dynamically from sources such as web pages and Word documents, the platform achieves several critical advantages that enhance its functionality and usability.
Manually adding information to a knowledge base can be time-consuming, especially when dealing with large volumes of content. By enabling dynamic import, Logicdialog allows administrators to quickly bring in content from various sources, significantly reducing the effort needed to populate the knowledge base. This, in turn, enables the platform to answer more questions, faster.
A dynamic import mechanism keeps the knowledge base in sync with its original sources. If the source of knowledge (e.g., a webpage or document) changes or updates, Logicdialog can reflect those changes automatically. This ensures that the platform's answers remain accurate and consistent with the latest information, avoiding outdated or misleading responses.
Knowledge is constantly evolving, whether it's updates to a company's policies, the release of new product documentation, or changes in industry standards. Dynamic imports make it easier to adapt to these changes by eliminating the need for manual revisions whenever the source material changes.
As the platform grows, maintaining a large knowledge base can become a challenge. By dynamically linking to external sources, administrators reduce the burden of manual upkeep. Instead of directly managing thousands of individual entries, they can rely on source documents and web pages to keep the knowledge base updated and relevant.
Dynamic import capabilities allow Logicdialog to integrate content from a wide range of sources, opening up possibilities to use public websites, private intranets, technical documentation, FAQs, and other structured information. This versatility enhances the depth and breadth of the platform's responses, making it a more valuable tool for end-users.
Dynamic import allows administrators to link external content to the Logicdialog platform. Once linked, the system can process and extract relevant knowledge from these sources for use in answering questions. This content is indexed in the knowledge base and can be retrieved as part of the platform's knowledge responses.
When the source document or webpage is updated, Logicdialog dynamically synchronizes the changes, ensuring the knowledge base stays current.
Logicdialog currently supports dynamic imports from:
Web pages: Administrators can link online resources, enabling the platform to pull information directly from the web.
Word documents: Administrators can upload or link to Word files, making it easy to include structured text, FAQs, or other relevant content.
Drink choiceCoffeeWaterTea
By giving your blocks meaningful, short, standalone titles that can be understood by the user at a glance.
In the Visual Builder, select the 3 dots menu icon on the block that will be shown directly before the existing block and then select Add next response. In the pop up, select Existing block and choose the block you want to re-use.
If you prefer, you can open the block that will appear directly before the existing block and Edit Response it so the Next Response field is populated with the existing block's title instead.

BlockURLCallDepending on the type of button you have selected you will also be asked for some additional information. For example, if you have selected a Link to Response type of button you will also be asked to specify which block this button should link to.
The Edit Label window will enable you to change the name of the button
You can remove a button by click on the Delete icon on the button in the dropdown menu.

Using integrations to retrieve information about the status of orders, or querying other internal platforms.
Answering commonly asked questions.
Taking payments, and arranging direct debits.
Integrate with over 6000 separate applications and systems.
... the list goes on.
All of this is possible to build, within minutes, and with no coding experience necessary thanks to our simple User Interface (UI) and intuitive Visual Bot Editor. The benefits speak for themselves, but don't take our word for it, listen to what our customers say :
“The bots streamline user experience, decreases dwell time and impacts call centre volumes. WBB can’t do enough for us, this has been a very positive experience .”
West Berkshire Council
“The logicdialog platform is doing a fantastic job in offering passengers a more convenient way to find information around journey planning, station facilities, and fares.”
Transport for Wales
“The support from Logicdialog has been instrumental. The regular catch-up sessions and task demonstrations ensure our operations run smoothly and any issues are promptly addressed. This ongoing support mechanism has not only ensured operational fluency but also enriched the customer feedback loop, providing invaluable insights for continual improvement."
Transport for Wales
So, if you want less calls, less emails, higher revenues, productive teams and happier customers then why not start building your first conversation flow now!
Reduce your inbound contact centre traffic by up to 60%. Customer facing intelligent bots that can execute complex processes as well as answer simple FAQs have a huge impact on the contact centre, and free up thousands of hours so your teams can focus on less repetitive, more rewarding work. Our bots do the ordinary so your teams can do the extraordinary!


Within any given solution there are a number of pieces of text which are standard. These might be the name of your bot, links to privacy policies and so on. Logicdialog allows you to change these via the settings page :
On this page you'll find a number of options, and the two that are relevant are Company and Web plugin.
Under the company settings page you can specify the following :
Company Name
Bot Name
Opening hours
Once you have made all the necessary changes, click on the Save Settings button at the top of the screen. The changes are made instantly.
Along with the company settings, the web plugin settings page allows you to modify the various pieces of standard text that are used if you are using our Chat Plugin. Note that these settings are not applicable if you are using an external channel such as Facebook.
As you can see in the image above, this page has a number of settings that you can configure as you need to. These options, just like the company settings, are available in all languages that your bot supports.
The options you can change are as follows :
Privacy policy URL & message
Company description
Availability message
A short message used to request feedback
Changing any of these options highlights a Save Settings button at the top of the screen which will then save the settings immediately.
For additional information about the Plugin Stylesheet option, please see our chat plugin documentation.
If you are making use of the Live Agent functionality in the product, then its most likely that you'll want to be able to configure times when those staff are available to answer queries and when they are not. These are defined as opening hours and outside of these times it will not be possible to handover a conversation to an agent.
Under the Company tab of the settings page you will see a series of opening and closing times. By default this will show on section for Mon - Sun. By default each section is checked with a standard opening time, bear in mind that this may not reflect your actual opening times so is always worth checking.
When the check boxes are selected this indicates your Agents are available within the times set. You can edit the opening and closing times for each day to reflect your teams availability. To ensure your Agents can't be contacted simply uncheck the boxes next to the days that you're not open.
It is very common to have exceptions to these rules. These may be bank holidays or staff training days where there will be nobody around to answer questions. In these scenarios you can add specific dates that will override any of the previous, more generic settings mentioned earlier.
There are two options, you can add an Exception or add a Bank Holiday, click on the Add Exception + button at the bottom of the screen. The resulting popup window will allow you to specify a friendly Title to help you identify where this exception is, as well as provide the date range of the exception. For example, if you are shut over the Christmas period then you may want to set the days from 20/12/2022 to 05/01/2023.
Creating an Intent is easy. You will need the name for the intent, and a collection of phrases that represent different ways the user might say or express the same thing. Once you have those, head on over to the Intents page, and click on the Add Intent+ button at the top of the page. You should be presented with a screen that looks like this.
When you have entered a title, we can add Utterances to the intent. Simply type the phrase you want to add and click Add + This will look at the phrase and try to identify any utterances contained within the message.
Any utterances that are identified will be underlined, you can click on one of these and get some suggestions to tag in your intent like you can see below.
If you are happy with the utterance, click Save to finish the process. You will now see a complete list of all the intents you have. If at any time you wish to add phrases or utterances to your intent you can click the three dots on the right hand side of the Intent and select Edit Intent
Whether you are editing an existing intent or adding a new one, you may want to add a larger number of utterances to an intent in one go. To do this, click on the Raw tab. This will show a window similar to the one shown below.
In the Raw tab you now have a text editor in which you can add as many different lines as you want, where each new line is a new utterance that needs to be associated with the intent. Once you've added the utterances you want to, flipping back over to the Training tab will then process the utterances and look for entities. If you are happy, click Save to complete the process. The list of utterances for that intent will have been updated, as shown below.
The topic field isn't a mandatory field when creating blocks of content, but it's good practice to get into the habit of using it.
It allows you to create groups for your content. For example, if you had a bank assistant that allowed users to get their balances and make transfers, you may have a topic for Balances and a topic for Transfers. The benefits of doing this are twofold:
Locating blocks will be easier
As your bot gets bigger and does more things, organising by topic will help you keep track of the blocks, assess any content gaps and help you to avoid duplicating content.
Analytics will be more insightful
The analytics area will track the popular (and unpopular!) topics within your bot. This helps you understand what your users use your bot for, spend your time wisely on well-used topics or make decisions to remove content.
On the Settings tab of the pop up, just fill in the topic field as you create your block. When you begin to write in the field a list will appear of existing topics to choose from. If an appropriate topic isn't there, just type in a new one and the platform will add it to the list.
When working with your bot there are various ways of removing content, based on what you are trying to achieve.
In this scenario you want to remove some content from the natural flow of the bot. For example you might have a button that links to a particular bit of content and you want to remove that button, but still keep the content it pointed to.
To remove the block from the flow find the block in the Responses screen and after selecting Edit Response click on the Trigger tab. Here you can see if anything is linked and unlink it by selecting the three dots on the right hand side.
Alternatively you can also ensure it's not linked to anywhere in the Visual Builder flows. Do this by removing it within the Visual Builder screen by clicking on the 3 dots within the block anywhere it exists and selecting Remove Response.
A square looking block icon represents that this block is linked to another block. A round target icon means that this block is associated with an intent. Remember to take a note of any intent or entities you unlink because you'll need to link these to new content blocks if you still want your bot to reply to the related queries.
If you want to ensure that this block is accessible via natural language processing then just make sure you to that block.
It is also possible to keep a response but make sure it's not accessible to users. This can be useful if you only include it in your bot during certain time periods.
To keep a block for future use, but to remove it from your bot for now, you need to first remove any links to it using the steps above, and then subsequently remove any associations with the intents.
A block such as the one above it not linked to any other blocks or intents because the Trigger tab shows no existing links.
The only way to delete a piece of content permanently is from the Responses screen. Find the block that is being removed and click on the Delete Response button. This will remove the content permanently so do this with caution.
An utterance is what the user has typed into the chat plugin. We we refer to this as what the user says, where as the Intent is about what the user means.
The reason the intent and the utterance are treated differently is because there is often multiple different ways of saying the same thing. For example :
When are my bins being collected?
What day is my bin collection day?
Is my green bin being collected today?
Remind me what day my recycling is being collected please.
These are all different utterances but the intent behind them would all be the same - specifically about identifying bin collection days.
Utterances are used to train Intents. By providing as many different examples of things that mean the same thing, the Natural Language Processing is better able to recognise that Intent again when a user has said something similar.
You can add new Utterances to an intent via the Intents page as shown above.
Here's the scenario: You're tasked to change the content the bot's putting out. But your bot is massive. So how do you find that one block you need? There are a couple of ways which we'll describe below.
You can use the Filters option at the top of the screen to find all the blocks that belong to certain topic by selecting the topic and finding your block in there.
Or, if you know the name of the block or some of the words the bot says, a quicker way can be to pop them into the search box at the top of the screen and it'll show you a list of blocks that contain that phrase in its message content or title name.
To edit from here:
In Janurary 2025 Logicdialog updated the tool that provides secure authentication for all of its users. While the majority of the features and functionality will remain the same, there will be a small implication to users the first time they log in after this update has been deployed. Specifically, users will need to set a new password.
Users will access the application via the same URL ( https://portal.logicdialog.ai ) however if they are not authenticated they will be redirected to a different login portal. This portal will look like the image shown below and will have reference to "Kinde" at the bottom. This is the authenticaiton provider.
From this screen you will need to enter the email address that you use to login. Doing so and clicking continue will take you to a confirmation page that will indicate an email has been sent to you.
The email will look something like this :
After entering the code in the browser, on the screen shown above you will then be able to set a password.
After completing this process you will be taken back to the application where you will have access to all the workspaces you previously had access to.
This password reset process is a one off task and next time you choose to log in, you can simply enter the password you have just created.
When a user needs to speak to a live agent, often it's about a specific query. If you have setup Departments in your instance you can use the topic of that query to route the conversation through to the most appropriate person in order to be able to help.
From the Settings page you will see an option for Takeovers. Clicking on this will show you the departments that have been set up and the Routing of each topic. Next to each topic you'll see a drop down box allowing you to specify a Department that will be used to hand this conversation over to.
Although the takeover routing will affect who the conversation is sent to first, this does not prevent the conversation from being picked up by others, or indeed transferred to another member of the team as appropriate.
If you need help for Logicdialog, and the information in this site has not solved your problem then you can always get in touch with us and we'll do what we can to help. The best way of getting support is to raise a ticket via our support portal.
When visiting this site you can log in using the same credentials you'd use to access the application. From there you will be able to raise a ticket, or see other tickets you've raised in the past.
If your problem relates to logging in, then please reach out to us via [email protected].
Thanks.
When building digital assistants it's often the case that you need to connect to external systems to either pull or push information. This might be for fetching the status of a request, or submitting the users form data to start a process. are used as a means of calling out to these external services to handle the information collected.
To setup a webhook you will need the URL for the HTTP API that will be sent the data from the conversation. This will need to be provided via an https interface.
Add the URL to the Webhook tab of the Settings page. The JWT token next to the URL input can be used to validate that the request has originated from IntelAgent, so that you can handle any other requests accordingly.
Once enabled, any function blocks or forms will automatically post the information collected through the form to this webhook URL. It is your responsibility to ensure that this API returns valid information, and handles any error or edge cases as needed.
An agent in the platform is someone who can log into logicdialog and either administer content, or respond to users who have come through to the live chat.
You can add a user from the Users page. Here you will see a button along at the top of the screen for Add User +
When you create an agent you'll be asked for a few pieces of mandatory information, all of which can be changed at a later date. These are First Name, Last Name, Email, and the Agent Role. If you have Departments then you can also select the department for the user.
We know that your bot must mirror your brand and so part of the logicdialog settings allows you to configure two icons.
The first of these icons is the Bot Avatar. This is the icon that the user sees next to all of the text from the bot, or one of the live agents. As you can see in the image below, this should mirror any branding or logos you have for your company.
The second of these settings allows you to configure the icon that is shown next to the Start Chat
At the core of any digital assistant is the content. It's what the user sees and is what will answer all their questions. Within IntelAgent, that content is stored in Dialog Blocks also called Responses or Blocks for short.
From a simplistic point of view a block is a placeholder for content. If your bot is setup to handle multiple languages then that block will give you the option of specifying the response in each of the languages you support.
Blocks are typically connected to each other to form a dialog and as you'll see from the Visual Bot Editor by linking blocks together you can create a series of paths through your content. Typically blocks are triggered through the use of buttons within the content.
Blocks can be chained together by setting a value in the Next Response property. If for example you had two blocks - an Intro
Events can really help you track specific content or flows to better understand user journeys.
A Chat Plugin is used to allow users to interact with your bot outside of the logicdialog platform, and specifically on a Website.
The plugin provides a piece of JavaScript that can be easily embedded on to any webpage - either public or internal - and will provide all the functionality you need. It can be configured easily in terms of colours, fonts and other branding to suit your needs.
In order to install the plugin on a website, or to understand how to configure the various parameters please refer to our separate documentation about the plugin.
Whenever you are collecting information from the user that you're probably going to want to use later, do it with a form. Even if it's a single question and even if you don't know exactly what you're doing with the information you're collecting yet, as it will just mean you won't have to change the conversation flow when you figure it out.
To create a form you'll need to add one or more questions. Within the question bank you'll find all of the bespoke questions you've created as well as a range of pre-defined questions available for use. Just select Questions tab on the nav bar on the left hand side of the page to view them.
The list includes things that you may regularly ask the user for no matter what sort of bot you're building - e.g. email address, telephone number, first name, last name etc.


A description of who the user is chatting with
The chat plugin title
A pop-up message introducing the web plugin
The button text that is shown prior to opening the chat plugin

Only one Webhook URL can be provided for each bot and so the handler-name on each block is used to distinguish between different parts of the same conversation. Using this handler name we can register different handlers to handle different events. In the image above, the handler name provided is submit-feature-request.
More information about building an HTTP API can be found in our SDK documentation.
When it comes to the user role, an Agent is someone who can answer conversations with users. An Admin on the other hand is someone who can answer conversations but also perform administrative tasks such as adding users and building models.
A department is a way of grouping users together. Its up to you how you use these groupings but typically each group will be specialists in answering a certain type of question or query from the user. The minimum you need to create a department is a Department Name however you can also optionally choose to override the default company opening hours as shown in the image above. In this case you are able to specify that this department is open different hours to the rest of the company. This might be either a reduced set of hours, or indeed perhaps a team that operates slightly more unsocial hours to the rest of the company.

Both of these settings can be changed via the Web Plugin page within logicdialog.
For the Avatar and the logo , editing either icon is the same process.
To change your chatbot’s icon, from one of the settings pages mentioned above :
Select bin icon under the current logo. This will remove the logo currently being used.
Once the image has been removed, you will be presented with an option to drag a new file on to the page. Doing so will upload a new logo.
If you are happy with the logo, click Save Settings to save the changes.
You should now see your new logo appear on screen, as well as the avatar on your bot.
MenuMenuOn the other hand, you can also specify the block to transition to after the next reply from the user. Using the On Reply setting you can create a situation whereby a user is asked a question, they type an answer and only after they've answered the question are they taken to the target block.
Another way blocks are used, is through Intents. An intent is the meaning behind a users question and we can use this to trigger a block without needing to go through a series of menus & buttons to find an answer. The intent that a block is associated with is shown under the Trigger section of a block.
WhatsApp is a great platform for easy "On the go" access to lots of information. While most people use WhatsApp to speak to friends and family, with logicdialog it's also really easy to connect your digital assistant to a WhatsApp telephone number so that your users can access the information your bot provides on the go.
To enable use of WhatsApp, logicdialog makes use of a platform called Twilio. Twilio is an international platform that supports messaging across a number of different channels including voice, SMS and social channels such as WhatsApp. It's trusted by companies such as Marks & Spencer and Stripe, and makes it simple to deploy solutions on these channels.
If you want to have your assistant on WhatsApp then there are a few steps to follow. These are outlined below :
Registering with Twilio is easy and free. There are no card details required and you only need a name, email address and password.
Once registered you'll be able to log into the dashboard to provision various services as needed. If you need a mobile number (for SMS, Voice, WhatsApp etc) then these come with certain costs. These are outlined on the following page.
At this point however you do not need to create any resources. All you need to do is to copy down the Account SID and Auth Token found on your dashboard home page, as shown below.
Twilio communicates with logicdialog via a webhook. This is essentially an address that information is sent to when events occur - a user typing a message in this case.
You will use a webhook for both your live solution, and while in testing. The process is the same, however where you apply the webhook settings will be slightly different.
For the purpose of testing we can make use of a WhatsApp sandbox that is free to use, but operates in exactly the same way as a live environment. You'll find this under the Settings menu, from within the Messaging section, as shown below.
On this page you'll see at the top there is an input field for When a message comes in. Set this value to be :
https://backend.logicdialog.ai/input/twilio/text
You will also need to ensure that the drop down option has HTTP Post selected.
Once you have done this, note down the telephone number, shown on this page. This is often an American number, and in this instance is +1 415 523 8886.
Before you can test the solution, add the telephone number, together with the Account SID, and Auth Token from the previous step, to the Channel on LogicDialog.
Note the format of the phone number, WhatsApp numbers must be prefixed by whatsapp:
To test the solution, first go through the Sandbox setup steps. Once all steps are completed, messages to the sandbox
In the case of the image above, I would send the phrase join rod-giant to +1 415 523 8886 in order to join the sandbox.
Any user can follow this process to join the sandbox however their membership will only last 72 hours.
Upon sending the message you should receive confirmation that you have joined the sandbox. From this point on you'll be able to send a message to your bot, and have it reply as appropriate.
You'll be able to interact with your bot as normal. Please note though that buttons are not a supported format on WhatsApp and so logicdialog automatically converts the buttons into a series of choices as shown above. A similar thing is done for any buttons with links or telephone numbers in. The message at the start of the choices can be configured as required on the WhatsApp configuration page.
In order to use a specific phone number with WhatsApp you need to be approved. This involves going through a registration process with Twilio to confirm your identity and the purpose for the phone number.
To request access, select WhatsApp senders from the Senders menu within the Messaging options. The Sign up to request access will take you through a series of steps you'll need to complete before you have access.
Once you have completed the registration process you will have a number that you can administer. There will be a similar setting to the one used for the sandbox where you can set the same webhook URL. Remember to update the phone number on the WhatsApp configuration page.
Zapier is an external platform that provides integration with over 3000 different applications and tools. Using the built in support for Zapier, you can quickly and easily integrate your bot with any of these 3000 applications.
Much like Webhooks, the Zapier integration will send all data collected in a user form to the service. To do this you will need to create a Zapier block, and associate the form you wish to receive information about.
Once you’ve created the form, the next step is to integrate it with the Zapier and any applications you need. Zapier has a concept of a Zap which is a predefined series of steps that together form your automation. You can chain multiple steps together, and each can be dependant on the information in the previous step. IntelAgent will be the starting point of all of these Zaps as it will start the process by sending the information from the form to the Zapier platform. To get started, register for the platform and Create a new Zap. Select We Build Bots from the list of integrations.
Each stage in a Zap will have multiple things to configure. The first of these is often authenticating with the platform you are trying to connect with so that it can successfully receive or send information. In the case of IntelAgent select We Build Bots from the list of applications and select the Form Trigger Event. Clicking Continue will prompt you to authenticate with the platform.
Once authenticated you will then be able to select the workspace containing your bot, and see a list of all the Zapier blocks contained within your application. You can create any number of Zaps, but they will all start from one block. If you wish to have multiple blocks linking to the same Zap then we suggest either redirecting to the same block from within the content, or duplicating the zap.
Once you’ve selected the form, the next step of the process will show you the fields within the form that you’ve selected. This step will show you both the name of the field, and a sample value from that field. These temporary values allow you to test the process prior to turning the Zap on and making it live.
Zapier will perform a test at the end of the configuration to ensure that it can correctly fetch the information you’ve selected. If successful you’ll be able to then proceed to the next step. At this point the information within the form is available for any further steps you wish to configure. For example, if you’ve collected the users email address you’d be able to use that to send the user an email if you wish. Add as many subsequent steps as you need to for your use case and after adding the final step remember to Turn On the Zap. Once turned on, any information completed in the selected form will be sent to the Zap you’ve just created.
Creating an Entity follows a very similar process to Creating Intents. On the navigation bar click on Entities then the Add Entity + button.
After clicking on the add entity button you'll be asked for a name for the entity group. This can be the most common term for the entities in this group. For example bins if you are going to define an entity containing recycling bin, green bin etc. How broad you make this will depend on your content and so in some cases having one entity for bins will be fine, whereas for others you may need a more specific entity called recycling bin which contains the various options for that entity.
Now that you've added a title you will be presented with the option of adding all the synonyms for this entity. A synonym is another word for the same entity. Add one synonym per line, press enter and this will create a new line so that you can easily add as many as you need. When you are done click Submit . The window will update to show the new entity you've just created.
You can add a new synonym at any time by using the three dots menu, and selecting Edit Entity.
Where as an Utterance is what a user might say, an Intent is what they mean.
In the context of a digital assistant we use Intents to help us reply to the users question. Behind the scenes the platform will take the utterance and pass it through some Artificial Intelligence that uses Natural Language Processing to recognise the Intent from the users Utterance. To do this it needs training.
The training is a collection of utterances that provide a representative sample of ways a user might mean the same thing. The NLP uses this information, together with the understanding of the language to understand how words are used together. By doing this it can then establish how close similar words are.
For example, let's consider the following utterances, which represent the Bin Collection intent.
When are my bins being collected?
What day is my bin collection day?
Is my green bin being collected today?
Remind me what day my recycling is being collected please.
Based on these examples, the NLP will be able to establish that bin or bins is frequently used when conveying the Bin Collection intent. Furthermore, because of the ways these words are used in the (English) language, it can also deduce that rubbish and recycling are equivalent words because they are often used in similar contexts, and in similar frequencies. With that in mind, this training means that if someone were to then type I can't remember what day my rubbish is being collected, because of the similarity of the words used, it'll still be identified as the Bin Collection intent.
Once a users Intent has been identified this can then be used to determine what response to provide to the user.
Now that you have created an Intent we need to be able to link it to our content so that we are able to trigger content based on similar utterances in the intent. There are two ways of doing this.
If you know the name of the response you'd like to associate with an intent then you can link the two together from the Intents page. Using the three dots menu associated with the intent, click on Link to Response. This will open a window, as shown below where you can select the block that this Intent will trigger.
After selecting the Response you want to link to, click Submit and from that point onwards the block will be linked with the selected intent.
If you are editing a Response, and want it to be triggered by an intent then you can also link the two together while you are editing.
In the Trigger tab, you can use the Search bar at the top right. Here you can type a sample message a user might type that'd you'd expect to trigger this response. Hitting Enter will then perform a classification on that phrase to find the intent that closest matches the phrase you've entered. In the case of the image above, we've searched for What is NLP? and it's returned a list of potential intents which are currently not linked to anything, and others which are already linked to other blocks. You can see which ones are already linked by a green dot and the label In Use. If we want to link to these intents we can select the three dots on the right hand side and the option to Link to selected Response . Alternatively we can perform a different search to find another intent.
After making the necessary changes, click Submit to make the update take effect.
There will be times when the digital assistant is unable to handle a query and at this point an Intervention will begin. This process will attempt to find an appropriate Agent to pick up the conversation.
When an intervention process starts, the conversation will appear on the Conversations page as shown below.
On this screen you can see the information about the user, if provided, a summary of the conversation and a blue button at the top of the page to Assign the conversation to yourself. Clicking on the blue button will transfer the conversation to the current user and you'll be able to type replies directly to the user.
If you have other members of the team who would be more appropriate to answer this particular conversation then you can reassign the user to them. Assuming the conversation has already been accepted as per the steps above, you should see a Change conversation owner button in the top right hand corner.
Clicking on this button will display a pop up, from here you can perform a few actions. You can Assign the user to another agent, Cancel Takeover or Return the user to the queue Select Assign to another agent and this will show the list of agents available, simply select one of the names you see. Doing this will remove the conversation from your own queue and place the conversation on theirs. The conversation will appear under the My Queue section of their workspace. They will not need to refresh their screen to see it appear.
If the conversation has been resolved, then selecting the blue tick button at the top right hand corner will effectively pass the conversation back to the bot.
This process will prompt you for a variety of information before you can click Complete Takeover. These bits of information such as the Topic and Outcome help to understand more about how the conversations were handled.
You can optionally add tags to the conversation, and decide on a block to send to the user when the conversation takeover has been completed. This can be useful to conclude the conversation or provide them with a follow up query.
If the same user was chatting to the bot on a different day you can view their interaction history via the History tab in the right hand section of their profile.
There are times when you want the content of a bot to be dynamic. This might be either to fetch some information, or even to save the result of the Forms that the user has completed. In order to "call out" or integrate with other platforms and systems, we have Webhooks.
A Webhook is an API that you can send data to, and in this case it is something that is accessible via a HTTP POST request. As a result, to use a webhook you will need a URL that will receive the information. You can specify this under the Webhook part of the Settings page.
Once you've setup the webhook, any Function blocks you have in your content will call out to this URL and pass the relevant data with it. As there is one webhook URL per bot, you may need a way to distinguish between one event and the other. We do this by specifying a handler name in the settings of a block.
You can specify any handler name you like, however you then use this name to differentiate between events. By doing so you can have one webhook that supports handling the events from two different blocks.
For more information about building a API that can handle these webhook events, please read our WBB SDK documentation which provides examples and more details.
We're writing to inform you of an important update that will take effect on August 6th 2024 affecting the login process for live agents.
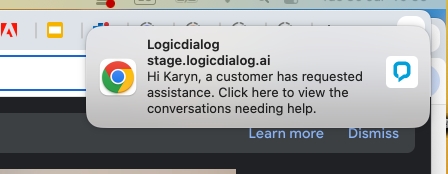
The platform has recently changed to provide more reliability when delivering notifications to agents when customers are waiting a live agent handover. This has been driven by recent changes in web browsers that prevent audio from being played to the user if they haven't yet interacted with the web page. As a result of this change, agents will now need to manually enable notifications each time they visit the application.
A new notifications section has been added to the bottom left corner of the application which can be used to toggle notifications as follows :
Log in to the platform as usual.
After logging in, please click the toggle located in the bottom left corner of your screen to enable notifications.
Please note that the default is for notifications to be disabled and this setting does not persist. This means that each time you log into the platform you must toggle the switch if you wish to be notified of customers waiting. However, this also means that you can also easily disable it if you are heading into a meeting and do not wish to be disturbed. This setting affects both the audible and browser based pop up notifications.
Notifications Disabled
Notifications Enabled.
Each time a notification is sent to an agent, both an audible and a browser based pop up is triggered. Audio notifications are always allowed in browsers ( although not auto-played as per the article above ) however the pop up based notifications need specific permissions. The recent update also ensures these permissions are requested and so you may additionally see browser based alerts asking for permission to send you notifications. Please click Accept for this.
If you do not see pop up notifications like the one shown below, then its possible that your Operating system, or browser settings have already been configured to deny any requests to show notifications. In this case, please follow our user guide on to allow browser based notifications.
A typical browser based notification
When a conversation is handed over to an agent, a notification is sent to all the agents who are currently logged into the platform. This notification makes them aware of the new conversation to handle so that customers aren't kept waiting.
These notifications are sent both as a sound, and also a browser notification. However, as this process is dependant on Internet Browser permissions its important that you setup your system correctly otherwise the notifications may not get to you. At present we support Google Chrome and Microsoft Edge for these notifications. The setup for these browsers is described below.
The first step to setting up Google Chrome is to click on the padlock icon next to the URL after you've successfully logged into the platform.
If ever you have a technical problem with the platform, you can raise a ticket by logging into the support portal at You can use the same login credentials to do so and once logged in you'll be able to raise a ticket.
To help us help you, try to include as many details as possible about the problem and ideally some screenshot of your browser console. An example of the `Console` and `Network` view are shown for Google Chrome below. Other browsers may vary slightly but the instructions of how to find the various tabs on different browsers are shown below.
As we continuously work to improve our services, we strive to keep our clients informed of important updates. In March 2024, we officially stopped supporting Version 1 of our chat plugin. To ease this transition for clients using the Version 1 code but who want to use Version 2, we provided an installer that ensured it was a settings change to toggle between the two versions. However, moving forward, this installer will no longer be supported as it continues to need maintenance and avoid vulnerabilities. As a result, if you're still using the original method of installing the chat plugin then it's important to update to newer approach as soon as possible.
Please note that the installer will still be live until March 2025, but will no longer be updated or maintained and this can potentially introduce vulnerabilties to your site.
Here’s a breakdown of what this means for you and the steps you should take next.


The old approach to installing the chat plugin looked something like the code below. Note that some of the parameters such as the hostname may be different but the approach will be the same.
If you’re still using the original code for installation, the installer redirects it to Version 2 based on your settings. This will continue to operate however as mentioned above, no new fixes or updates will be applied to this installer. Once the installer has loaded Version 2 of the chat plugin, this code is maintained and updated. To avoid potential disruptions, we recommend updating the method of installation to avoid using this 'installer' so that there is no unsupported code used.
It’s easy to switch to the latest version of our chat plugin:
Navigate to Settings > Channels in your account for the workspace you wish to update.
Click on Connect under the Chat Plugin section.
Copy the raw code provided, it should look like the example below.
Replace the existing code on your website with this new code.
Please pay attention to the 'client' parameter as this will ensure it is loading the correct workspace. if you have multi-lingual websites you may also need to change the 'language' property based on the language set on your website.
If you encounter any issues or have questions about this transition, feel free to reach out to our support team. We’re here to ensure a smooth upgrade process. Thank you for your understanding and continued support as we work to provide you with the best tools for your business.
var host = ';

window.addEventListener('wbb_plugin_loaded', function(event) {
  new WBBChatPlugin({
    client: "afeltham",
    pluginHost : host
  });
} )

// Add the WBB styles to the DOM
var $wbbStyles = document.createElement('link');
$wbbStyles.setAttribute('rel', 'stylesheet');
$wbbStyles.setAttribute('href', host + 'wbb-chat-plugin.css');
document.body.appendChild($wbbStyles);

// Add the WBB application logic to the DOM
var $wbbPluginScript = document.createElement('script');
$wbbPluginScript.src = host + 'wbb-chat-plugin.js';
$wbbPluginScript.async = true;
document.body.appendChild($wbbPluginScript);<div id="uniqueIdForWidget"></div>
<script async src= " ></script>
<script type="text/javascript">
const logicDialogParamsSettings = {
client: 'afeltham',
language: 'en',
startBlock: null,
}
var logicDialogParams = logicDialogParamsSettings;
</script>In this example, you can see that the Camera and Microphone have been enabled and that the connection is secure. These settings are required if you wish to use the video calling feature within the platform.
The next step is to click on the Site Settings link, which should then open up a tab like the one shown below.
In this picture you can see that Notifications and Sound have also been set to Allow so that the application can send you notifications and play a sound while doing so.
Finally the last setting to check is via the System settings. If the system settings prevent notifications, then it doesn't matter what the browser settings are, notifications will not be sent. These settings are dependant on your operating system and are explained in the section at the end of this page.
To start setting up Microsoft Edge, click on the padlock near the URL in the address bar.
From here, click on the Permissions for this site. This should open up a new tabe that looks a bit like the one below.
In the resulting window, ensure that Notifications are set to Allow. Other permissions for Camera and Microphone are needed if you are using the video call feature.
In addition to these settings, please ensure that the device specific settings are enabled as described in the section below.
In order to check your system notification settings you'll need to ensure Notifications are enabled in general, but also for your specific application, such as Chrome or Edge. Depending on which platform you are on, please check the images below to ensure that the right settings are enabled.
On Windows, click the Start button and then Settings. In the navigation pane on the left, choose System, then Notifications. At the top of the page, make sure Notifications is on by swiping the button to the right. In the Notifications from apps and other senders section, make sure Google Chrome is turned on as well as shown by the arrows on the image below.
You'll find the settings for Mac computers via the System Preferences application, under Notifications & Focus.
When changing these settings, find the application from the list on the left and select it. Ensure that Allow Notifications is ticked. We'd also suggest using Banners instead of Alerts
Additionally ensure that Play sound for notifications is checked.
Enable the Developer Menu by going to Safari’s preferences (Safari menu > Preferences) and selecting the Advanced Tab.
Make sure the checkbox that says ‘Show Develop menu in menu bar’ is selected.
Once enabled, you’ll find the developer console by selecting Develop > Show Javascript Console
Your console will either open in your existing window or the Safari window. It will automatically open on the console tab.
Open the Chrome menu in the top right-hand corner or the browser window.
Select More Tools > Developer Tools
The console will open in your existing Chrome window or in a new window. You may have to select the console tab manually.
Select the Firefox menu in the top right hand corner of your browser
Select More Tools > Browser Console.
The console will open in a new window.
Choose the Edge menu in the top right hand corner of the browser window
Select More Tools > Developer Tools
The console could open in your existing Edge window or in a new window, and you’ll need to manually select the console tab.
With the console open on the console tab, get the problem you’re experiencing to fire again. Then take the screenshot. If you need to scroll to get everything, take a few,
Then move along the tabs where Console is selected, and select Network. Again, take screenshots of what you find here.


To streamline the process of adding and maintaining Word document content in Logicdialog's knowledge base, we use Microsoft Power Automate. This setup allows us to dynamically import content from Word documents and keep it synchronised with updates or deletions in the source files.
File Created or Edited: Triggers when a Word document is created or modified. The flow fetches the updated content and sends it to Logicdialog.
File Deleted: Triggers when a Word document is deleted. The flow ensures that the corresponding knowledge in Logicdialog is removed to avoid outdated responses.
Access to Microsoft Power Automate.
A shared folder or document repository (e.g., SharePoint, OneDrive) where Word documents are stored.
Note that in the information below we'll refer to <rootURL> which is a parameter specific to each client. Logicdialog will provide this to you upon request.
Purpose
When a Word document is created or updated, its content is sent to Logicdialog via an HTTP request to update the knowledge base.
Steps
Trigger: When a file is created or modified
Use the "When a file is created or modified (properties only)" trigger.
Specify the document repository or folder to monitor (e.g., SharePoint or OneDrive).
Action: Get file content
Purpose
When a Word document is deleted, the corresponding knowledge entry in Logicdialog is removed to avoid outdated responses.
Steps
Trigger: When a file is deleted
Use the "When a file is deleted" trigger.
Specify the document repository or folder to monitor.
Action: Send HTTP request to Logicdialog
Please note that for this process to work, the owner of the flow in Microsoft Power Automate needs to be an owner of the SharePoint site where the files are located as well.
Forms are the basis of requesting information from the user. You can create any number of forms you wish, and each form can contain any number of questions.
Creating a form is simple, just follow these few steps :
To ask the question, or series of questions via a form in a conversation you'll need to use a Function block. When editing this block, you'll see a field called Form which tells the block which questions to ask the user at this time. In the drop down list you'll see all the questions and forms available to use.
When testing your bot you may have noticed that sometimes it doesn't ask you questions in the form that are associated with a given block. This is deliberate because the bot remembers your details from a previous conversation you had with it. We have purposely designed logicdialog to do this, as from a user perspective - you expect the bot to remember your email address after you've input once in the conversation. For example, if your bot handles multiple use cases where a user might enter their email address then the second time they complete one of the use cases we can reuse the email address from before.
There are times however that you might want the bot to forget the details. For those times, you can use the Unset form function which will reset the form values.
If you want to make sure that the bot forgets any answers it has captured through a form, include the Unset form function when the bot has finished using the answers for what it needs. You can do this either from the Responses screen, or when on the Visual Builder.
From the Visual Builder add a Next Response to the block of content that finished processing the form. Choose the Unset form block type from the preset functions. Populate as normal and choose the form you wish to unset in the form field. When you're finished remember to set a next block for the block you just added if you want the bot to send anything else to the user.
This video shows a form you could set up in your own bot in a matter of minutes.
When a conversation is handed over to an agent, a notification is sent to all the agents who are currently logged into the platform. This notification makes them aware of the new conversation to handle so that customers aren't kept waiting.
These notifications are sent both as a sound, and also a browser notification. However, as this process is dependant on Internet Browser permissions its important that you setup your system correctly otherwise the notifications may not get to you. At present we support Google Chrome and Microsoft Edge for these notifications. The setup for these browsers is described below.
The first step to setting up Google Chrome is to click on the padlock icon next to the URL after you've successfully logged into the platform.
In this example, you can see that the Camera and Microphone have been enabled and that the connection is secure. These settings are required if you wish to use the video calling feature within the platform.
The next step is to click on the Site Settings link, which should then open up a tab like the one shown below.
In this picture you can see that Notifications and Sound have also been set to Allow so that the application can send you notifications and play a sound while doing so.
Finally the last setting to check is via the System settings. If the system settings prevent notifications, then it doesn't matter what the browser settings are, notifications will not be sent. These settings are dependant on your operating system and are explained in the section at the end of this page.
To start setting up Microsoft Edge, click on the padlock near the URL in the address bar.
From here, click on the Permissions for this site. This should open up a new tabe that looks a bit like the one below.
In the resulting window, ensure that Notifications are set to Allow. Other permissions for Camera and Microphone are needed if you are using the video call feature.
In addition to these settings, please ensure that the device specific settings are enabled as described in the section below.
In order to check your system notification settings you'll need to ensure Notifications are enabled in general, but also for your specific application, such as Chrome or Edge. Depending on which platform you are on, please check the images below to ensure that the right settings are enabled.
On Windows, click the Start button and then Settings. In the navigation pane on the left, choose System, then Notifications. At the top of the page, make sure Notifications is on by swiping the button to the right. In the Notifications from apps and other senders section, make sure Google Chrome is turned on as well as shown by the arrows on the image below.
You'll find the settings for Mac computers via the System Preferences application, under Notifications & Focus.
When changing these settings, find the application from the list on the left and select it. Ensure that Allow Notifications is ticked. We'd also suggest using Banners instead of Alerts
Additionally ensure that Play sound for notifications is checked.
Using the API keys within the platform it's possible to use code to create assets such as Responses, Intents, Entities, Builds and many more things. In addition you can also use that API key to be able to fetch the analytics programmatically.
To get an API key, click on the profile button in the bottom left of the screen, and then Edit Profile. From the resulting page you'll see the section for API keys, and from there you can create a new Key. Existing keys will look something like the view below.
Please note that when creating a key you'll be given a prefix


Add the "Get file content" action to retrieve the contents of the Word document.
Use dynamic content to pass the file identifier from the trigger to this action.
Action: Send HTTP request to Logicdialog
Add the "HTTP" action.
Configure the request as follows:
Method: POST
URL: <rootURL>/import?import?filename=@{outputs('Get_file_metadata')?['body/Name']}"
Headers:
Content-Type: application/json
Authorization: Bearer <Your-API-Key>
Body:
Test and Save the Flow
Save the flow and test it by creating or editing a file in the monitored folder.
Verify that the content is successfully imported into Logicdialog.
Add the "HTTP" action.
Configure the request as follows:
Method: DELETE
URL: <rootURL>/delete?filename=@{triggerOutputs()?['body/FileNameWithExtension']}
Headers:
Content-Type: application/json
Authorization: Bearer <Your-API-Key>
Test and Save the Flow
Save the flow and test it by deleting a file in the monitored folder.
Verify that the corresponding entry is removed from Logicdialog.


api keyTo fetch Analytics data, you'll need to ensure you have Fetch Analytics selected in the list of permissions.
There are a number of APIs for various pieces of data, and accessing them is generally all the same. For example, if using NodeJS, the following will work..
Each API request has a number of common parameters that appear on the query string of the URL. These are :
dateFrom - the start date for the analytics.
dateTo - the end date for the returned analytics
client - the workspace name to fetch analytics for.
resolution - this represents the granularity of the data returned. The value can be either hour, day, week, month or quarter. Note that when this resolution is used, it'll modify the dateFrom to be the start of that resolution. For example, if dateFrom is 2024-04-16T10:57:12.873Z but the resolution is set to month, then for the purpose of the returned data, dateFrom will end up being 2024-04-01T00:00:00.000Z - ie, the start of the month.
The following table lists out all the APIs that are available to be used.
api/agent/analytics/user
The number of users created, and active within the selected time period. Note, this filters out conversations that have not interacted with the bot at all.
api/agent/analytics/nlp
The number of natural language inputs that have had a success, and those that have not been able to match an intent for the provided time period.
api/agent/analytics/message
The number of chat messages sent by the users in the selected time period.
api/agent/analytics/active-channel
The channel used by the users within the time period specified.
api/agent/analytics/message-groups
The identified topic the user was asking about for the days within the time period.
api/agent/analytics/sentiment
The number of positive, negative and neutral conversations for the given time period.
Please note, this is not an exhaustive list and is subject to change as new information is added to the platform. For a more up to date view, please use the Network tab within the developer console in a browser. Go to the Analytics page within Logicdialog and filter for "analytics". This will show you all the available analytics endpoints and examples of the data they return.


With logicdialog you can write your content once, and deploy it to multiple other channels without any changes to the content. One such channel is Facebook.
To get your bot running on Facebook there will be a few steps that you'll need to do.
Step 1: Create a Facebook Developer Account
If you don't have one already, create a Facebook Developer account by going to the Facebook for Developers website and signing up.
Step 2: Create a Facebook Page
Chances are you will have already got one of these if you have an existing business or presence on Social Media. There is more information about this on the Facebook site should you need it. It is this page that we'll be adding the bot to.
Step 3: Create a New App
Log in to your Facebook Developer account.
Click on the "My Apps" dropdown in the top right corner and select "Create App."
Choose the "Other" category and select "None" as the app type. Fill in the necessary details for your app.
Step 4: Copy App Secret to LogicDialog
Open you Facebook App, under App Settings click on the Basic menu item
Copy your App secret and paste into Logicdialog ( settings -> channel -> facebook ) by clicking on the connect button, paste into App secret field.
Submit the changes
Step 5: Add a Product (Messenger)
To connect your app to a Messenger page, you need to add the Messenger product to your Facebook app:
In your app's dashboard, click on the "Add Product" button.
Find and select "Messenger" from the list of available products.
Configure the Messenger settings, including the webhook and access token, as needed, described in the next step.
Step 6: Set Up a Webhook
To connect your Messenger page to your app, you'll need to set up a webhook:
In the Messenger settings, click on the "Add Callback Url" button.
Enter your webhook URL and Verify token. This Url and Verify token can be found on logicdialog settings -> channel -> facebook by clicking the connect button ( screenshot from step 4 ).
Verify and save your settings
Step 7: Add Messenger to Your Page
To connect your Messenger page to your app, you'll need to link them together:
In the Messenger settings, under "Access Tokens," select the page you want to link.
Click the "Add or Remove Pages" button and follow the prompts to link your page to your app.
Step 8: Connect your page with LogicDialog
You'll need an access token and page Id to interact with the LogicDialog bot. Here's how you can get one:
In the Messenger settings, under "Access Tokens" select the page you want to link.
Clicking on the Generate Token button will prompt you with a pop up window. You must check the button that says I Understand before it'll show you the full access token.
Once you have copied the access token, along with the page ID please add it to your logicdialog settings -> channel -> facebook clicking on the Add Page button.
Step 9: The final step is then to subscribe to various events that facebook can produce
In the Messenger settings, under "Webhooks" select the page you want to subscribe and click on Add Subscription.
The events to sign up for are below:
Once everything has been setup correctly you will be able to use the Message button on the facebook page to start talking to your digital assistant. If you need any further help setting things up, please don't hesitate to get in touch.

const request = require('request');

const options = {
  method: 'GET',
  url: 'https://backend.logicdialog.ai/api/agent/analytics/nlp',
  qs: {
    dateFrom: '2024-04-16T10:57:12.873Z',
    dateTo: '2024-05-15T10:57:12.873Z',
    client: 'afeltham',
    resolution: 'day'
  },
  headers: {
    accept: 'application/json',
    authorization: 'Bearer <prefix>_<apiKey>',
    origin: 'https://portal.logicdialog.ai',
    'wbb-client': 'afeltham'
  }
};

request(options, function (error, response, body) {
  if (error) throw new Error(error);
  console.log("Analytics Data", body);
});
api/agent/analytics/events
A count of the number of times each event in the workspace has been called during the given time period.
api/agent/analytics/user/detail
Pie chart data for channel, country, language and rating for the users in the selected time period.
api/agent/analytics/response
The responses used to handle user queries within the time period specified. Each entry will identify the number of views, likes and dislikes for each response, along with an indication of if that response was triggered by a button, or through natural language.
api/agent/analytics/urlTracking
The counts of the links clicked on within the responses within the time period specified.
api/agent/analytics/blocks
A breakdown of which response was shown to the user by date within the time period selected.
api/agent/analytics/intervention
The number of interventions to live agents in the selected time period.
api/agent/analytics/intervention/average-time-by-agent-series
The average time for a conversation that has been handed over to a live agent within the time period specified.
api/agent/analytics/intervention-detail
The channel, topic and outcome of any live agent interventions started within the time period specified.
api/agent/analytics/intervention/average-time
The average time and duration for the the interventions within the time period specified.
api/agent/analytics/active-user-language
Returns the language used by the user for the given time period.


{
      "filename": "@outputs('Get_file_metadata')?['body/Name']",
      "file": "@body('Get_file_content')"
}


Business Messages is a mobile conversational channel that combines entry points on Google Maps, Search, and brand websites to create rich, asynchronous messaging experiences that delight customers and drive business results.
Logicdialog allows you to connect your digital assistant to this platform so that as soon as someone searches for your business, they can chat directly to the bot and get the answers they need. This page will help guide you through the integration of the two platforms.
To setup Google Business Messaging (GBM) there are a few steps that you'll need to follow, which are outlined below :

More detail on each of these steps are given below.
In order to use GBM, you first need to register as a partner. By registering as a partner you can create agents for brands and enable messaging experiences for customer services, sales, and other business applications. The registration is a simple process, as follows :
Under Business Messages, click Create partner account.
You will then be prompted to complete a few bits of information about your Partner account. Following that, click Create to create the account.
Once registered as a partner, you'll need to create a Service Account. This service account is used to securely authenticate API calls to the Business Messages and Business Communications APIs.
On the Business Communications Partner Console home page, click Partner account settings.
In the left navigation, click Service account.
Click Create key, then click Create.
Following these steps will prompt your browser to download the service account key. Store your service account key in a secure, private location. As you need its content for the next steps.
Now that you are registered as a partner and have a service account, we can proceed to create an Agent. An agent is the interface between your customers and you. It'll have a brand, including a name and an avatar, and various other settings.
Creating an agent is straight forward and can be done from the partner console.
Click on the Create Agent link here and follow the resulting dialog windows to create the agent. You can always adjust settings at a later date if needed.
On the Overview screen, please make sure you copy down the Agent ID as you'll need this for steps in the process later on.
Also, on the Agent Information page (visible in the left menu), please ensure that the Welcome Message is set appropriately, and that the Primary Interaction is set to Bot.
Finally, ensure that you have added some Locations to your Agent via the menu on the left hand side. These locations are how Google will map a search result to your bot and so it's important you add Locations that you are responsible for, and where you want the bot to reside.
When messages arrive into GBM from your users, these need to be forwarded on to the Logicdialog platform so that we can handle them. This is done through a mechanism called a Webhook. This is essentially an address that will be sent data.
Before configuring this, you'll need to set some credentials on channel settings within Logicdialog. To do this, visit the LogicDialog Channels page (it's part of Settings page) and click Connect on the Google Business Messaging option :
A new window will open with the settings that you need to change in order to configure GBM.
The Agent ID was copied in the steps above when you created an agent, and Service Account is downloaded to your computer so you just need to copy its content and paste there.
To set Client Token you need to go to the Integrations section on the Agent page from Business Communications Partner Console.
Firstly disable Helper Bot, afterwards click Configure on the Webhook section. It should show a small window like the one below:
As you can see the client token is hidden so click the rotate arrow and a new token will be shown. Afterwards copy its value and go to LogicDialog to paste it at the field of Client Token on the GBM Configuration, then click submit.
Now to verify the webhook, go to the open window of Webhook integration from Business Communications Partner Console and for webhook endpoint put the URL that was shown at GBM Configuration with this format (e.g. if the client is webuildbots-customer-service):
https://backend.logicdialog.ai/input/gbm/callback/webuildbots-customer-service
Afterwards, click Verify.
When Business Messages verifies your webhook, the dialogue closes.
With everything now setup, you can test your solution works as expected. To do this you'll need to send yourself unique URLs that allow you to talk to your bot before it has been verified and published. These URLs are at Agent Test URLs which you'll find at the Agent Information on the Overview page of the agent you wish to test - Android, iOS and Send.
The first two of these will show a QR code you can scan with your mobile's camera to take you to the bot. The Send button will email you links, which again will take you directly to the application.
Once you have confirmed that the bot is working as you'd expect, you'll need to verify the application. This can be done using the Verify menu in the left hand menu.
You will need to verify the locations you've added to your agent as well as the general configuration. Once verified you'll then be able to go through the Launch process which is again available from the left hand menu.


Along with the other channels, such as Facebook, WhatsApp and Google Business Messaging, logicdialog allows you to connect your digital assistant to a bot running inside Microsoft Teams. This guide will help you setup the connection and highlight anything you need to know in order to get this to work well.
To get the setup working from end-to-end there are a number of steps you'll need to complete. These are roughly as follows :
These steps assume that you have already created your workspace and have a digital assistant inside logicdialog. It also assumes that you are on an enterprise tier within Microsoft 365 and have the necessary credentials required to perform these tasks.
From within the Azure portal home page, click Create a resource and search for Azure Bot in the resulting screen. You should be taken to a screen that looks like this :
When creating the bot, you'll be asked a number of questions including the name of the bot and the Resource Group. These will be specific to your installation, but you need to:
Enter the bot handle name in the Bot handle field.
Select your Subscription from the dropdown list.
Select your Resource group from the dropdown list.
Next, you will be taken to the validation screen. It can take a moment until validation passes, and when it is done, click Create.
When your deployment is completed, select Go to resource. The bot and the related resources are listed in the resource group.
Now your Azure bot is created and we can create client secret.
On the resulting screen, there will be a menu on the left called Configuration . Click on this and note down the Microsoft App Id as shown highlighted below.
While on this page, also click on the manage password link, next to the Microsoft App Id item. This will take you to another page where you can create a new password for this app ID.
Press the New Client Secret button.
The Add Client secret window appears. After providing a description and selecting Add button, copy the value that is in the Value column for the new entry created. Note this down along with the App Id from the earlier step.
Finally, we'll need one more bit of information. From the Azure portal, use the menu to select Azure Active Directory. The page should look something like the image below.
From this page, please copy the Tenant ID.
Next, we'll also need to setup a clientId and clientSecret so that the application is able to retrieve the information about the user using the bot.
To generate a clientID :
Go to the home page of your Azure account.
Select Azure active directory in the left sidebar or home page Azur services list.
Click Enterprise applications in the left sidebar.
Click All applications in the left sidebar.
Select your application to look up the user details, i.e., their name/email address etc.
Click Properties.
Copy the Application ID. We'll refer to this as the clientId.
Once you've done this, you'll then need to generate a client secret.
Go to the home page of your Azure account.
Select Azure active directory in the left sidebar or home page Azur services list.
Click App registrations in the left sidebar and next choose All applications tab.
Select your application to look up the user details, i.e., their name/email address etc. The same one, which you selected when you have been creating clientId
Click on Certificates & secrets in the left sidebar.
Select the tab Client secrets and click New client secret.
After providing a description and selecting Add button, copy the value that is in the Value column for the new entry created. Note this down as clientSecret.
With this value created, you'll now need to grant this App registration permissions to be able to access the directory of users. To do this, click on the API Permissions menu and from there use the Add a permission button to find permissions to add. You'll need to ensure that Directory.Read.All is enabled, and granted the admin consent using the button shown.
Now that you have the necessary information, we need to link the Azure bot, with your bot in logicdialog. Login to Logicdialog portal and go to the Settings page (to see this page you must have an admin role), from there choose Channels.
Find MS Teams card and click Connect.
Now you should see MS Teams Configuration modal. Add here your tenantId, appId, appPassword, clientId and clientSecret
Note down callback URL generated for you. This looks just like any other URL and will allow the Azure bot to send us information when the user enters anything or clicks on buttons within MS Teams. Save the changes.
Once you have this information, you will need to go back into the Azure portal and add this URL to the configuration of the Azure Bot. You'll find the setting under the Configuration menu. The field name is called Messaging endpoint.
After you've entered the webhook URL, press Save and then head over to the Test in WebChat page from the menu on the left. You should now see responses from your bot and you can interact with it and test that it is all working.
If the bot is working well here, then you are okay to move on to the next stage.
Once the link between Azure and logicdialog is tested and working properly, we need to package this integration up into an Application that others can use. We do this through the Developer Portal application, within MS Teams.
From the Apps tab of this application, create a new application and give it a name. A screen will appear, like the one below, providing a number of different configuration options.
You will need to complete various bits of information as part of this process. Some of those will be specific to your organisation - such as the name, description, avatar etc. With regards to the bot, go to the App features menu and select Bot . From here you'll be able to add the App Id of the bot we've created earlier. Ensure the Personal scope is selected.
After completing the necessary information, you can head back over to the Dashboard page to get a status of the application. This page should show no warnings or errors.
A button at the top right of the screen should allow you to Preview in Teams and allow you to test the bot as needed.
At this point you have an application that is connected to the bot, and has the necessary information in it to be able to be published to the store. Using the Developer Portal application, find the app and select the Publish to org page. A pop up window will appear giving you options to be able to add the Application to your organisation.
From there you should then be able to find the application via the normal Apps Catalog and start interacting with your bot.